Nuke Workshop 02 - Planar Tracking Graffiti
- Deano Smith

- Oct 15, 2020
- 3 min read
Updated: Oct 16, 2020
Higher Frames in a video is a lot more difficult to work with because it will take longer to get through all the frames.
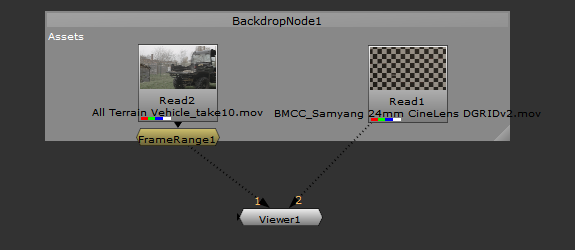
This is the materials I am using for this task:


What our goal is for this task is to make it look like the graffiti is part of the video scene.
We need to set up a few things before starting, these being:
-Changing the frame rate
-Change size format to 1080p
-Change max panels to 3
I then added a backdrop calles assets which I am going to put behind each asset used so I can easily identify them.

Hold down control if you want to move the backdrop, and only the backdrop.
A postage stamp node clones any assets it is connected to.
Next I added a reformat node to the stamp because my original video wasn't the correct size.


Press W for a write node. Then we write it to a file I created titled 'Narrow Street TGA 25fps' which is located inside the scans file which is in renders, this is what the write node looks like after:

Now I'm ready to render out the video.
Narrow Street TGA 25fps.####.tga
Space bar goes into full screen
To make sure the video is constantly rendered I press this button:

This is so that if I zoom in and out and move around the video it won't lag.
I then inserted a planar tracker and connected it to the rendered clone node.

What I have drawn in white pen is a planar. Basically any flat surface like walls and floors

Using a Cusped Bezier I drew out where my grafiti is going to be.

Clicking the rhombus shape will allow the planar to move with the video.
After fully tracking, it looks really good and doesn't move hardly at all.
I then clicked on the correct plane button and move the two left edges of the yellow rectangle to match my original shape.

Using the grid I can see that it lines up perfectly because the gap from the line on the grid and the pavement bit on the bottom of the wall is equal throughout.

I am now going to test the planar by added a checkerboard image to it and see if it looks good.

I then added another write node which I'm using to merge the checker into the video, with the B arrow to the video and the A to the checker.
Once connected I moved the viewer node to the merge node, and doing so allowed the checkers to show up on the video, and it looks very good.
Then I read in the rat banksy graffiti and replaced the checkerboard, and it is called a Slap Comp (Something slapped on top of the camera plate very roughly)
Because the image jumps and breaks at the end, I added in a frame range node so that the video ends just before that happens.
Now I just went into the nodes and tidied it up by added backdrops to each part.

I now added a transform node which I can use to move and resize the graffiti.
I added a keyer which I can use to luma key my graffiti image and get rid of the white wall.
When trying to key the rat I will adjust range until the black becomes solid.
Choking - When the picture gets jaggedy and semi transparent pixels are removed.

I then inverted the color so that the opposite part is removed when in video.

This is what the rat looks like in the video

B splines are good for use on organic shapes. Which is what I used for the rat.

This is what it now looks like

Now I'm going to add some grunge texture to make it look worn. I inserted it and merged it with the rat graffiti.
q turns the roto off and back on
Feathering helps to soften and smoothen the edges.
This is what it looks like with better edges:

I went and blurred it a little bit too so it didn't look too sharp or as if it had just been graffitied.
Finally this is my planar tracking task completed in full.
This took such a long time to complete but in the end I think it looks cool, but I don't think it was worth that amount of time to complete because it was so draining and tiring, for such little.


Comments